Ribbon embroidery for beginners butterfly patterns. 3D satin stitch embroidery of a butterfly and a flower
Butterfly embroidery with ribbons: ideas and master classesButterfly embroidery with ribbons: ideas and master classes
Inspiration for this or that needlework can be found everywhere. Everything that surrounds us can be the basis for creating a beautiful creation with our own hands. Today in the ribbon embroidery section, you will learn how to embroider a butterfly. Such a beautiful fluttering insect is a great idea for decorating a pillowcase, it is a wonderful addition to your home decor.
with floral motifs. Finding a use for a bow tie made of ribbons is not at all difficult, and embroidering it is quite easy. In what you now also will be convinced. 


How to embroider a butterfly with ribbons
Anyone can embroider a butterfly with satin ribbons, even a beginner craftswoman. On average, such work will take you from a few minutes to half an hour, depending on your skills. For embroidery, prepare ribbons with a width of five and twelve millimeters. You can use a different width of the material, so your butterfly will eventually take on a more voluminous look than the one presented in this master class.
At the first stage, you need to embroider a body of tape on the prepared fabric, five millimeters wide. For this, a “forward needle” seam is used. Please note that the distance between the stitches should be small (only a few base threads), four and a half centimeters long. Next, a one cm stitch is laid, which will serve as the butterfly's antennae. After that, the needle is brought out to the outside. 

Further, the tape wraps around the needle several times and is brought to the wrong side near the previous puncture. You need to pull the tape tightly when passing the needle through the warp. Follow the step-by-step photos that illustrate the progress of the work.
Thus on outside, you should form a knot, as in the photo. The next mustache is done in a similar way. 

Butterfly wings are embroidered with a loop with an attachment. The second wing is embroidered with a slight overlap on the first. 


To create the lower wings, use tape with a larger width. In this case, a “long stitch with a curl” seam is used. The tape adheres to the front part, after which it folds to the wrong side. Further, in the opposite direction, you need to pierce with a needle at the top vertically in the center of the satin material relative to a certain stitch length. As a result, you should form a sharp corner, consisting of symmetrical curls along the cents of the ribbon, as in the photo. 

The second lower wing is also embroidered.
This completes the master class. See how such a cute ribbon butterfly fit into the overall flower arrangement embroidered with ribbons.
Original butterfly made of nylon ribbons
Another interesting option will show you the idea of \u200b\u200bembroidering a butterfly from nylon ribbons. step by step photos master classes will help you easily repeat such an element on any material.
To create the next butterfly, prepare:
- tapes;
- a needle;
- scissors;
- beads;
- lighter;
- fabric for embroidery.
The master class begins with cutting the ribbon into small pieces that fold in half. Then, diagonally make a basting with threads and cut the ribbon into two parts. The next element is also typed on a thread using a running stitch. Be sure to singe the cut edges with a lighter so that the material does not crumble. 


By pulling the thread, you will get a pair of wings. Repeat the previous steps and create more wings. 

Made blanks are sewn together and fixed on the selected material. After that, you can proceed to the decor. For the body, use several beads of a light shade, and for the head - one dark one. The antennae are sewn with ordinary stitches with a black thread. 


Next, you can let your imagination run wild and add interesting decorative elements. For example, in this master class, a flower stem and several roses from satin ribbons were additionally embroidered. 

The resulting delicate and airy butterflies beautifully complemented the plain fabric of the towel.
Video: Learning to embroider a butterfly
Comments
related posts:
 Ribbon embroidery of a picture in a photo and video master class
 Ribbon embroidery master class pansies video and photo
Stitch embroidery is interesting and varied. Let's decorate the product together and it will become unique. You can embroider anything: tablecloths, pillows, clothes, jewelry, towels, napkins, scarves, and so on. For beginners, you can advise a simple stitch embroidery. It is better to start with a small pattern. It is important to understand that the essence of this embroidery is even stitches that are close and very tight to each other.
Stitch embroidery can be different: two-sided and one-sided, straight and oblique. Technique and type of embroidery: simple, artistic, convex surface, slotted, dashed, voluminous, satin, white, Vladimir, Russian, Poltava.
If you want to learn how to embroider with satin stitch, you do not have to memorize all the stitches and techniques right away. You can start with a couple of stitches that are useful for embroidering flowers, butterflies, small drawings, animal figures.
Embroidery is possible on different fabrics. Neither the weave, nor the color, nor the composition matter. It all depends on the thread you are sewing with. If you took Mouline threads for work, then it is better to take cotton fabric: cotton, linen, burlap. If the threads are silk, thin cambric, satin or silk will work well. Dense fabrics are suitable for Iris threads.

What will be needed for work? You will need a needle. Choose the right needle for the job. The choice of needle depends on the fabric and threads, we also take into account the pattern. The thinner the needle, the more professional your work will look. Next, we use hoops or frames for work, as you like. On the hoop, the fabric is more stretched, which is important for the pattern and the convenience of the embroiderer.

You will also need small scissors, a thimble, and carbon and tissue paper. Who knows how to draw, it's easier, you can just draw a picture on the fabric with a pencil.
If you don't have the ability to draw, use carbon paper. To do this, put carbon paper on the fabric, place the pattern printed on the printer on top. We chip off this design with pins and draw around the contour. Let's break it down and get to work.
Different techniques can be used in different details of our embroidery. For example, large details can be embroidered with long stitches, and narrow stripes, small details can be embroidered with short small stitches. Techniques are often confused with types of embroidery. It must be remembered that one type of embroidery can be done in different techniques.


Let's start with a straight stitch. It will be enough for a novice craftswoman to know this seam in order to do the simplest work. The name comes from the straight stitch simple form. The stitch length is different, from 1 mm to 7-8 mm. For example, in a white surface, this stitch outlines the outline of the pattern.
You can embroider large details and contours with a straight stitch. It is not suitable for small parts. It is also used to fill the inside of the part.

Straight stitch can be done at any angle. Leaves are embroidered with open herringbone stitches, fragile long stems are made with a fern stitch, you will create a smooth, flawless line with a stem stitch. A split stitch is needed for contour lines.


Wedge and chevron stitches can be sewn on the sides of the design to fill in the empty space. The finished dot looks like a coffee bean, the grain is used for the effect of light and shade inside the part.


Satin stitches are the next most difficult step in embroidery. The surface is used to give the pattern subtle tint transitions. Using silk threads, you can embroider landscapes, portraits, genre scenes. Such a surface is called artistic.
Varieties of surface: shadow, attached, one-sided, two-sided, slotted, white, counted, flat and convex.
A convex smooth surface is needed to give the pattern additional relief. The flooring is embroidered with a simple stitch, and then they act in the opposite direction. Increase the height of the part and make it convex and embossed.

The herringbone stitch performs the motif of the leaves. It is carried out with diagonal stitches close to each other.

Cross stitches are made with crossed threads. This technique can be used to highlight the center of a sheet or the middle of another shape.

The embossed herringbone seam is very beautiful, diagonal cross stitches are superimposed on each other in it. Embroider the center of the sheet with a Romanian stitch.

Braided stitch consists of groups of stitches embroidered in clear rows. The emphasis is on chiaroscuro. If you have already mastered the previous techniques a little, you can try working with a shadow surface. It helps to create an interesting and beautiful color transition from one to another on the product. Such a transition is called a gradient.

Common stitches. Chinese knots subtly shade and complete the pattern. Rococo stitch we often see inside flower arrangements.


We embroider the iris step by step using the simple stitch technique.
For work you will need:
- Silk threads: dark purple, purple, white, orange and green.
- Fabric (linen, chiffon, kapron, batiste, and so on). Here is chiffon.
- Hoop.
- Scissors.
- Fine needle.
Our work is done on chiffon, so there is no need for tracing paper or carbon paper. We put the fabric on the drawing, fix it with pins and draw on the fabric with a pencil or pen.

Here it is shown how to embroider one flower, but if you wish, you can embroider the whole composition. We will embroider with silk in one thread.

We decorate the petals of the lower part of the iris with a dark purple color. Leave the distance between the stitches for white.


Let's start embroidering the next petal. First, we will embroider the bend of the iris petal.

Embroider pansies with ribbons
This master class is ideal for beginner needlewomen who decide for the first time to embroider a picture with their own hands using satin ribbons. Thanks to step-by-step actions and photos with a detailed description, anyone can embroider these wonderful flowers on their own.
Before you start embroidering flowers, you must first draw them on the fabric of your choice:
In order to make it more convenient for you to work later, all the seams and stitches used to create this picture are marked in this figure.

It is also better to prepare all the materials necessary for work in advance:
- you will need a small piece of fabric 20X20cm.
- two needles: one for ribbons, and the second for working with threads.
- purple threads.
- 1 m 6 mm green satin ribbon.
- about 20 cm of yellow ribbon.
- about 50 cm of a wider yellow ribbon.
- 50 cm of the same thickness of purple ribbon.
- and 70 cm 12 mm lilac ribbon.
- hoop.
- a pencil or chalk with which you will draw a pattern on the fabric.
To choose the right materials for the future picture, as well as to understand how the tapes differ from each other, you can watch a short video:
Video: materials for embroidery with ribbons
Beginning needlewomen can be advised to watch a video clip that shows how to properly thread a ribbon into a needle:
Video: how to thread a tape into a needle
So, after you have inserted the ribbon, transferred the pattern to the fabric and tucked it into the hoop, you can proceed directly to the embroidery itself:

Pansies can be embroidered in a variety of ways. After watching a short video, you will see one of them:
Video: pansy embroidery workshop
We embroider a basket with lilacs
The previous pansy ribbon embroidery was quite easy. Now let's try to complicate the task a little.
After carefully reading our master class, you can embroider a basket with lilac branches with ribbons:
Let's start by preparing all the necessary materials:
- scissors;
- lighter;
- hoop;
- needles;
- the basis for the picture;
- threads;
- satin ribbons.
Of course, you can buy ready-made prints for embroidery with ribbons, but since we do not have a very complex pattern, we will mark its contours on the fabric with our own hands.
Then, having tucked the material into the hoop, we will be able to start embroidering lilac branches. We will need to bring a needle with a ribbon and a needle with a thread to the front side.
Using a needle and thread, we will have to make several stitches on the tape: first 2 along it, then 1 across, again 2 along and 1 more across.
Gently pulling the thread, you will pull off the tape, and you will get one small lilac flower. Having done this, you will need to bring the needle to the wrong side and fasten the thread there.
In this way, you will need to make the desired number of flowers. The main thing is not to forget to fasten the thread on the wrong side every time.
You can independently choose the size of the branches and their number. However, pay attention to the fact that embroidered branches look prettier if you embroider them with ribbons of different shades.

Following our step by step instructions, you have embroidered a bouquet of lilacs, and now you need to decorate it with green leaves. You can do this in two ways:
- sew on leaves, making stitches with curls;
- or cut them out of a thick green ribbon and, having processed the edges with a lighter, simply sew the resulting leaves in the right places.
At this stage, we will embroider a basket for our bouquet with our own hands. First, we will need to make large horizontal stitches, as in the presented photo.
Then we will need to make vertical stitches so that they intertwine with horizontal stripes, forming a "checkerboard pattern".
To make it easier for you to imagine how to do this, you can look at the photo with the finished basket.
This is what the finished work looks like, made using the technique of embroidery with ribbons. In this picture, embroidered lilac branches are made using different colors and shades. Some leaves are also made in two colors, but the basket itself, on the contrary, is plain.
Separately, I would like to note that you can embroider lilacs in different ways. Our master class told you, perhaps, about the simplest of them.
However, in order to inspire you, you can familiarize yourself with some finished paintings. On them you will see lilac branches embroidered with your own hands.
Photo gallery with finished works:
Bouquet of lilacs in a vase

Flower arrangement of roses and lilacs

Beautiful bouquet embroidered with colorful ribbons

"Gentle Miracle"

Large bouquet of lilacs

Lilac embroidery with thin ribbons

Roses and lilacs

You can also watch a video in which the master embroiders lilacs:
Video: learning to embroider lilac ribbons
In most cases, professionals use ready-made pictures for embroidery, as this greatly facilitates their work. But this does not mean that without a special picture you will not be able to embroider the bouquet you like.
After all, ribbon embroidery is not just one of the types of needlework, it is rather a way of self-expression. You can feel like an artist who creates a real masterpiece from the very beginning to the end with his own hands.
We embroider a butterfly with ribbons
Ribbon embroidery allows us not only to create beautiful pictures, but also to add additional details to them. For example, you can decorate paintings on which various flowers embroidered with satin ribbons are made using butterflies of different colors and sizes.
Let's try to decorate the pictures by embroidering beautiful butterflies on them:
Ribbon embroidery apple butterfly

This is how we will embroider:
For work, we need black threads and ribbons (white, black and red).
- Any embroidery with ribbons begins with threading the ribbon and fixing it on the fabric. In addition, before starting work, it is necessary to transfer the pattern to the fabric and thread it into the hoop;
- Having finished with these preparations, you will need to embroider the inside of the wings with red ribbons;
- The outer parts of the wings are embroidered with black ribbons in two rows using an overlap;
- Then white details are embroidered on the edges of the wings;
- The top of the front wings is worked with entwined basting stitches, and the rest of the wings are sheathed with a Palestrina stitch;
- At the very end, the antennae and body are embroidered with black thread.
Ribbon embroidery Danaida Chrysippa

Form and appearance this butterfly is slightly different from the previous model. In order to embroider this beauty we need:
- black and brown threads;
- black, white, beige and gold ribbons.
Let's get to work:

You can also make a bow tie out of ribbons. in a simple way. To do this, you just need to watch a short video:
Video: embroider a butterfly with satin ribbons
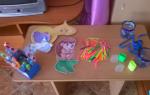
Inventory
"Born" on the shores of Foggy Albion, the "thread" technique is now very popular in the domestic space. Considering that today both master class tips and diagrams with numbers come to the aid of the needlewoman, the product does not seem complicated at all. To get started, you need to prepare:
- Needle with a large eye;
- Cardboard (color - any);
- Threads of different colors;
- Awl;
- Finely honed pencil;
- Styrofoam;
- Ruler and scissors;
- Scotch.
Work on the corner
For many beginner craftswomen, the “threading” technique seems difficult. But this is not at all the case, and having mastered the basics, you can create real masterpieces. The butterfly pattern suggests the presence of not only rounded, but also sharp elements. In this regard, you need to master the pattern of stitches when filling a corner. To do this, a master class for beginners will help you.
Do the following manipulations:
- Turn the work material over and use a ruler to draw an angle;
- Divide each of the sides of the corner into small segments no larger than one centimeter in size;
- Put down dots (ascending and descending);
- Use a needle or awl and pierce each of the points;
- Connect the stitches by numbering with a thread;
- Carefully fasten the thread on the wrong side using tape.
Working on a circle
The butterfly consists of four circles. Also, depending on the scheme with numbers, the picture can be supplemented with other nice elements.
In order to fill in this figure using the “thread” technique, you will have to do simple manipulations that a child can handle.
We work out the circle
“Arm yourself” with a template or compass and proceed with the steps recommended by the master class for beginners.
- Draw a circle (the size of the circle depends on how big your butterfly will be);
- Divide the figure into several identical segments (their number, always even, depends on the “wishes” of the scheme);
- Put down the numbering (counterclockwise);
- Insert the needle from the wrong side of the product;
- Perform stitches similar to those with which you filled the corner (remember that when working with the proposed figure, you must embroider along the chord);
- Complete the circle carefully.

Working with butterfly wings
After you have "filled your hand", you, guided by the tips of the scheme with numbers, will be able to create a whole composition of butterflies. You must act as follows:
- Circle the template carefully;
- Using a needle, divide each of the wings of the drawn insect into twenty identical segments;
- Fill in the shape.
The wing is ready!


Remember that the patterns in the "thread" technique will differ depending on the large or small distances between points, called chords. Depending on what the diagram advises you, you can fill in the figure by diameter. If you divide your circle-wing into eight equal parts, then you will get a surreal butterfly a la Salvador Dali. The pattern on her wings will be star or cobweb.
If you are just learning this simple technique, then the embroidery of circles and corners should be fixed with a different number of points. Embroider the figures in this way: fill the large circle in one direction, and the small circle in the opposite direction.

A little later, you will be able to create interesting, unusual and rather complex paintings and successfully experiment with threads of different colors.
The threads you use can be either ordinary spool threads or thin woolen threads. The denser the structure of the thread, the more voluminous the product will look. If you opt for thin threads, then the butterfly you made will turn out to be more lacy and delicate. Experienced craftswomen recommend using silk threads. So, regardless of the wishes of the chosen scheme, the drawing will look elegant and rich.
Also, beginner craftswomen should follow some rules:
- knots do not need to be made (they easily slip through the holes), it is best to use adhesive tape or glue;
- markup should be done on the wrong side of the work;
- on the front side of the product, holes should be made with a thick needle, on the wrong side - with a thin one;
- if the pattern is small, then the pattern will look much more refined and interesting;
- segments must be exactly the same.
Finally
After you master this simple technique, you can perform more “serious”, intricate patterns. Works made with isothread are perfectly combined with both strict office and cozy home interiors.
Butterfly schemes with numbers


In today's master class, we continue the theme of volumetric embroidery with threads. Such embroidery requires more effort and perseverance than usual. But the result will exceed your wildest expectations! To master the embroidery technique, you need to know many different techniques, one of which we will talk about today.
As a rule, needlewomen move on to volumetric embroidery when they master the usual technique of cross-stitch or satin stitch embroidery. For beginners, we recommend using special patterns for embroidery, on which the finished pattern will be applied with paints. Such embroidery kits are sold in all specialized stores. They are affordable.
As a rule, such kits contain the drawing itself applied to the canvas, threads for embroidery and instructions for use. All that is needed for embroidery is to embroider a pattern applied to the canvas with threads of the desired color. As a result, you get a real picture. When you get a little comfortable with embroidery according to ready-made drawings, you can proceed to more complex volumetric embroidery.
To make such a beautiful butterfly appear on your canvas, you will need threads and ribbons, which we also purchased in a specialized store. Everything is very simple. But you still need a little patience.
Please note that my picture, which I embroider, is drawn on canvas, and in color. in this way it is easier for you to match the colors of threads and ribbons.
First, we will embroider the body of the butterfly and the antennae. To do this, use two turns of thread around the needle. The body of a butterfly consists of two colors of thread.

Add dark thread to the veins between the knots and at the ends of the tendrils. I recommend adding a gray thread for shadows on the butterfly's body.

Now let's move on to the wings. We will need a water-soluble fabric and an organza ribbon. Lay the ribbon between two layers of fabric and stretch it over the hoop. The diameter of the hoop can be the smallest.

Draw the design on the fabric. Use a pre-made template or draw your own.

Now insert the thread for the butterfly outline into the needle. Make the first injection with a needle in the center between the wings. Pass the needle through all layers of fabric. And then we will lay out the stitches in the same way.

Then bring the needle out from the bottom in the middle of the inner part of the wing. Go along the contour with a running stitch, grabbing one millimeter of fabric with the needle. Try to make the stitches gently, without undue tension.

Then go to the outside of the winglet and fill in the outline with reverse stitch. You will get such a lattice.


Change the thread in the needle to a gentle light color and embroider the flecks inside the wing using a one-turn French knot. Add a couple of straight stitches, indicating the veins on the wing. at the top of the wing, add specks of beads. Attach the knot to reverse side wing.

Take scissors and carefully cut along the outline of the embroidery.

Then place the part in a bowl with cold water and wait until the tissue dissolves.