Walkthrough of the main plot of The Elder Scrolls V: Skyrim. Daedra quests (final version) “Fallen” - captivity of the dragon and peace in Skyrim
- Main article: Quests (Dawnguard)
Invisible visions(orig. Unseen visions) - quest of the main storyline of the factions Clan Volkihar and the Dawnguard in the addition The Elder Scrolls V: Dawnguard.
Returning after completing the previous task, the main character needs to find Dexion Ivik, who could read both remaining Elder Scrolls. Finding him, the hero learns that the monk is blind. Although Dexion will not be able to read the scrolls, he will indicate a way how they can be read without being blinded. To do this, you need to go to the cave Glade of the Ancestors and perform a special ritual.
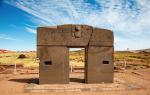
Glade Ancestor
After entering the cave, you need to go down for a scraper knife, which is necessary to collect bark from a tree that attracts moths hovering in the cave. It is not necessary to catch moths, it is only required that they fly after the main character. To do this, you need to walk through the cave in search of clusters of these insects. There are seven such clusters.
After a “fluttering aura” forms around the protagonist, you need to stand in front of the altar and read the Ancient Scroll. After that, a ghost will appear in front of the hero, who will tell about the next step to the fulfillment of the prophecy - the place where you can find Auriel's Bow. When the ghost disappears, the protagonist will be attacked by vampires sent by Harkon (if the protagonist is on the side of the Dawnguard) or Dawnguard warriors sent by Isran (if the protagonist is on the side of the vampires). Note: in the cave you can find a leveled shield with a fire resistance enchantment. To do this, you need to stand in front of the altar so that there is a pink tree exactly behind it, then turn to the left - there will be a stream flowing over the stones; at the end of the brook there will be a shield.
Bugs
- After reading the Elder Scroll, a task will appear - to talk with Serana, but at that time she is fighting behind bars with hostile vampires, so this is impossible.
- Solution: immediately after reading, you need to press the "Wait" button for about 12 hours and only then go to Serana. Or, you can use console commands. Open the console, click on the hash and type disable . After that, you will have to fight the vampires.
- After completing the quest, an aura may remain around the main character, which reduces visibility, especially in the dark.
- Solution 1: make a save and exit the game. In the launcher, in the "Files" section, disable Dawnguard (uncheck). Re-enter the game, take a couple of steps, save and exit the game again. After that, you can connect Dawnguard and continue the game.
- Solution 2: To remove the unwanted effect, you will need to install Moth Aura Remover
Quest stages
To go to a certain stage of the quest, enter in the console:
Setstage DLC1VQ06 stage
where the stage parameter is a number, the stage of the quest (all stages are listed below).
| Unseen Visions (ID: DLC1VQ06) | |
|---|---|
| Stage | Diary entry |
| 10 | I myself will have to look for an alternative method to decipher the Elder Scrolls and find Auriel's Bow, since Dexion is blind. I was offered to perform an ancient ritual so as not to go blind after reading the scroll. Now I must go to the place known as Ancestor's Glade to perform the ritual. (Quest updated): Find the knife of the priests of the Moth. |
| 20 | (Quest updated): Harvest the bark from the Song Tree. |
| 30 | (Quest updated): Attract the attention of swarms of Ancestral Moths. |
| 40 | (Quest updated): Enter the pillar of light and read the Elder Scroll (Blood). |
| 50 | I used the knife to collect the bark from the Song Trees growing in Ancestor's Glade, which will help me attract the attention of swarms of Ancestor Moths. I felt a surge of energy flowing through my entire body, and now I feel myself being pulled towards the huge column of light at the center of the Ancestral Glade. (Quest updated): Read the Elder Scroll (Blood). |
| 60 | I am now standing in a column of light that rushes straight into the sky, in the center of the Ancestral Glade. Trusting Dexion, I performed the Ancestor Moth Ritual and now I can read the Elder Scrolls. I need to start with the Elder Scroll I got in Soul Cairn to find out where to find Auriel's Bow. (Quest updated): Talk to Serana. |
| 200 | After I read the Elder Scroll, I saw a startling vision in which there was a cave far to the west of Skyrim. This appears to be the location of Auriel's Bow. If I want to stop Harkon and prevent him from performing the Tyranny of the Sun ritual, then I must report there immediately. or After I read the Elder Scroll, I saw a startling vision in which there was a cave far to the west of Skyrim. This appears to be the location of Auriel's Bow. If I want to perform the ritual of the Tyranny of the Sun before Harkon, then I must report there immediately. |
| The stage marked in green corresponds to the successful completion of the quest, and in red - to its failure. | |
Notes
- Not all quest stages may appear in the quest log. Which of them will appear and which will not depend on how the quest is completed.
- Stages are not always displayed sequentially. This usually happens if the quest has multiple possible endings, and also if some of the quest steps can be completed in any order.
- If the stage is marked green, i.e. as the end of the quest, then this means that the quest disappears from the list of active quests in the journal, but new entries related to the quest may still appear in the quest journal.
Tramp Dervenin from Solitude asks you to help him get his owner back from vacation. According to him, the owner can be found in the forbidden wing of the Blue Palace, where the mad King Pelagius used to live. Having received the royal pelvic bone from Dervenin (useless, but can be sold), we go to the palace.
You can get to the Blue Wing by asking Fulk Firebeard or Una the cleaning lady about it. The wing has long been abandoned and covered with cobwebs, but the journey along it will soon be interrupted, and you will find yourself in a strange place where the Daedra lord Sheogorath spends his “vacation” along with the late Pelagius the Third.
Sheogorath will agree to interrupt the rest on the condition that you get out of the mind of Pelagius. You don't have any weapons or spells, just the Wabbajack staff you've been given. You need to go through three arches in turn and perform three simple steps:
- Behind the first arch on the left, where the atronachs are fighting in the arena, you need to apply Wabbajack to the spectators watching the grip.
- For the next - to shoot "night fears". Each subsequent fear is caused by the use of Wabbajack on young Pelagia.
- After the third arch, you will have to use the same staff to increase Pelagius' Confidence in size and reduce her enemies.
It is done! Our reward is the Wabbajack, a magical staff that fires a random spell each time it is used.
Returning to reality, do not forget to search the room for valuables.
Taste of Death (Namira)
In the city of Markarth, there are strange rumors about a local tomb. Learn about them from the bartender at the Silver Blood, or head straight to Understone Keep, where you'll find the Hall of the Dead and Brother Verelius. He will explain that someone is eating the dead and ask us to investigate this case.
If you do not agree with this formulation of the question and do not want to become a cannibal, kill Eola.
If not, help clear the Cliff Cave from the undead - from the beginning to the very altar of Namira. After that, Eola will ask you to bring brother Verelius to the cave. Do it or tell him about Namira's sinister plans.
Convince Verelius to come with you and bring him to the altar, where Namira's servants, invited to the meal, are already waiting. After that, do whatever you want - either obediently kill Verelius and start eating him, or save him at any moment and kill the cannibals.
The reward will be Namira's ring - it gives the opportunity to improve health by eating corpses. And the hero will have an unpleasant smell from the mouth, about which everyone will begin to report to him.
Door that whispers (Mephala)
Door that whispers (Mephala)
The owner of the Prancing Mare tavern in Whiterun will tell you that something strange is happening to Jarl Balgruuf's children.
The jarl himself will not deny the problems and will offer to talk with his son Nelkir (thereby asking everyone if they are also going to lick the jarl's boots). Nelkir will send us to a certain Whisperer in the basement.
The whispering door in the basement will introduce itself as Mephala. She will ask the hero to open the door and send him back to Nelkir for advice. The boy will tell you that the Jarl or the archmage of Farengar has the key. The easiest way to rob a mage.
Behind the door in the basement lies an ebony sword and a book warning that the artifact is dangerous. Quest done! The sword is the reward. It absorbs the health of enemies, and you can increase the effect if you kill several friends or companions with it.

House of Horrors (Molag Bal)
In Markarth, near the Silver Blood tavern (slightly up the street), Turan, the sentinel of Stendarr, roams. He will ask you to help him explore an abandoned house where, according to rumors, the Daedra are worshiped.
Alas, the house will turn out to be Molag Bal's trap and you will have to kill Turan.
Go down to the basement, to the altar of the Daedra Lord. There, touching the rusty mace and having been in the cage, you will receive the task - to bring to Molag Bal the priest of Boethia, named Logrolf, who ruined the mace.
The priest was captured by the Outcasts and kept in one of their camps (in which one - the random number generator decides). Leave the house, go to the indicated place and, after clearing it, take out Logrolf. Under any pretext, bring him to Molag Bal and, when the priest gets into the cage, knock on him with the mace issued by Molag Bal - and then, when the daedra lord orders, kill the priest.
The reward will be the pretty mace of Molag Bal, which takes away strength with magic and captures souls.

The only cure (Peryite)
The only cure (Peryite)
It is not easy to take on this assignment. Having reached the tenth level, you can wait a long time for a meeting with a sick refugee who will tell us where the sanctuary of Peryite and its guardian Kesh the Pure are located. But you can try to find this place in the mountains northeast of Markarth and northwest of the settlement of Karthwasten, south of Druadah Hold and southeast of the dwarven ruins of Bthardamz.
It's worth going there already with a kit that Khajiit Kesh will ask for. We need a Flawless Ruby, a Silver Bar, a Poison Bell, and Vampire Ashes. Silver ingots are the easiest to find - they are sold by blacksmiths, and you can steal an ingot in the same Kartvasten, where there is a silver mine. The poison bell grows in many places - especially in the northwestern swamps. Of course, it is easy to find it in alchemists. Vampire Ashes can be obtained from vampires or bought from an apothecary. Flawless Rubies are rare, but are starting to drop from vendors at higher levels.
Having received the necessary ingredients, Cash will brew a potion, and we, inhaling green smoke, will be able to talk with Peryite. He needs to kill the traitor Orkendor and his Taken in the dwarven ruins of Bthardamz, which is a stone's throw to the northwest. The dungeon is very large, and you can wander there for a long time. But there are no puzzles there, except for a couple of levers that need to be pulled to open a passage or set a trap next to an unsuspecting enemy. Mechanical spiders, spheres and a lone centurion live in the dungeon. Mage Orkendor - at the very end of the dungeon. Take the books and the key from him, take the elevator to the surface and return to Peryite.
To talk to him again, inhale the green smoke. The reward is the Spell Breaker shield, which in the "combat" position creates a ward spell.
Beyond the Ordinary (Hermaeus Mora)
We receive this task according to the plot, meeting with the scientist Septimius Segonius on his small island north of the College of Winterhold. But you can take the task just like that, if you visit him in the shelter and ask. For information on how to get to the Black Reach and what to do there, read the description of the Ancient Knowledge story quest. Solving the puzzle in the Mzark tower, we will get the Ancient Scroll and along the way fill the cube with knowledge.
When we return to the scientist and give him the filled cube, he will ask you to bring blood samples from an orc, dark elf, bosmer, high elf and falmer (you can get all the samples in Blackreach or in any other places). To get out of the cave of Septimius, you will have to talk with the Disgusting Abyss, that is, with the Daedra Lord himself.
Returning to the scientist, give him the blood. The path to the book of books will open - Ogma Infinium. She raises six skills at once by five points to choose from - magic, thieves or military. To learn, open the book and press the action key.
On the way back, talk to Hermaeus Mora.
Call of Boethiah (Boethiah)
The quest is activated only after the hero hits the thirtieth level. It can start with an unexpected attack, reading a book about Boethiah, or when the hero comes across a sanctuary (east of the Windhelm stables, on the very edge of the map), where Daedra worshipers fight in an impromptu arena.
Boethiah will offer to sacrifice a companion. If you don't mind (and if the companion isn't particularly dear to you), order him to approach the luminous pillar and perform the sacrifice.
The last task is to visit the bandit camp on the opposite side of Skyrim. Clear the cave and "demote" the former warrior of Boethiah. Put on his ebony chain mail and listen to the last instruction of the Daedric Lord.
The reward is the same ebonite mail. She makes her steps quieter, poisons enemies that get close to the hero, and looks very pretty, especially in stealth mode.

Call of the Moon (Hirsin)
The quest starts in Falkreath, if you talk to the inconsolable Mathieus - he can be found in the cemetery (a scene is played there) or in the tavern. He will tell us that his daughter was torn apart by the werewolf Sinding, who was caught and put away in the barracks. Look there (the quest can be started there as well).
Sinding admits that he is a werewolf, but states that the random and unpredictable transformations into a beast are a curse that Hircine, the patron saint of hunters, placed on the enchanted ring. He will offer us to settle things with Hircine ourselves and advise us to first kill the white deer in order to summon the Daedra Lord. After giving the ring, Sinding will turn into a beast and jump out of the barracks through the roof.
The deer grazes near the city - it is easy to find and shoot it.
Indeed, after the deer falls, Hircine will appear and say that he is very angry with Sinding for stealing the ring. The task is to find a sassy werewolf in the Drowned Grotto, kill and skin him.
Inside the cave we will find a slightly beaten group of hunters, the last of which will die after telling in general terms what happened ("The victim is stronger than the hunter. Kill him in the name of Hircine!"). But Sinding, sitting on a cliff a little further away, will offer a counter plan - to hunt hunters with him. If we still decide to kill Sinding, first he will arrange the slaughter of hunters - you can join the battle right away, kill the werewolf, remove the skin and accept the light Skin of the Savior (resistance to magic and poisons) as a reward from the ghostly Hircine.
If we take his side, the hunters will be stronger, and as a reward, at the exit from the cave, we will receive Hircine's ring cleared of the curse. It gives an additional transformation into a beast per day and is useless for non-werewolves.

A night to remember (Sanguine)
This quest differs from others in that it is not so easy to find it. The key character - Sam Geven - can appear in any tavern in Skyrim. But the task is simplified if you remember: Sam appears in the tavern that is closest to the hero when he reaches the fourteenth level - and he does not leave this tavern anywhere. Remember what you did at that “age”. If you still have old saves, look in them where your hero was at the moment when he "hit" 14.
A friendly booze with Sam (you guessed who it is?) will suddenly stop, and we will find ourselves in the Markarth temple of Dibella, where they will tell us about the wedding and the goat and offer to clean up the remnants of yesterday's debauchery. Cleaning can be avoided by persuasion or money.
Our next stop is Rorikstead. Farmer Ennis accuses us of kidnapping his goat Gleda, which has now gone to a giant named Grock. The goat must be returned - the giant, of course, will be against it.
The next lead is Whiterun and a certain Isolde, demanding the return of an engagement ring from the Witchmist Grove. You can avoid finding the ring by connecting money or persuasion. But it’s easier to go to the “bride”, the fortuneteller Moira, and take the ring from her by force. When the ring is returned to Iseult, we will receive the last tip - to the fortress of Morvunskar. There, a crowd of evil sorcerers and Sanguine himself are waiting for us.
The reward for the quest is Sanguine Rose, a staff that summons a Dremora to help us.

Shards of Past Glory (Mehrunes Dagon)
The quest begins with a leaflet that the courier will give us at the twentieth level. The owner of the Dawnstar Mythic Dawn Museum, Sil Vesul, wants to collect the Razor of Mehrunes, the legendary dagger of the past.
The razor is divided into three parts and is kept by three different characters:
- Jorgen of Morthal can be "persuaded" to give up the key to the house. The handle is in the chest.
- The head of Dagon's Razor is kept by the wiser Draskua in the large Forsworn camp (there we will also find a wall with the Word of Power).
- We take the key to the vault from the orc Gunzul in the orc fortress Cracked Tusk and, having gone down there, grab the fragments of the Razor (beware of traps).
After receiving the three parts and attaching the scabbard to them, Sil will offer to meet at the sanctuary of Dagon. It is better to climb there from the northern slopes of the cliff.
Mehrunes will offer us to kill Sil in order to become his hero and get the Razor (a dagger that gives a chance to instantly kill the enemy on impact), and Sil wants to get out and hide the Razor under museum glass. The choice is yours. Either way, there will be a fight. Do not forget to take the key from the Dremora and loot the sanctuary.

Cursed Tribe (Malacath)
The quest is available from the ninth level. We can either hear rumors of an orc stronghold in Riften or head straight for it.
The fortress of Lagashbur is located southwest of Riften, at the foot of the mountains, a little further than the Tower of Darkness. Help the orcs get rid of the giant. They will tell you that the tribe is cursed, and they will ask for two ingredients for the summoning ritual of Malacath: troll fat and Daedra heart. Fat is easy to get (from the same trolls, for example), but hearts are the rarest ingredient, and they fall from Dremora, which are very rare. To get the heart, do the Mehrunes Dagon quest or enter the College of Winterhold - there they can be found in Enthir's assortment.
After the ritual, Malacath will say that the tribe is suffering for the cowardice of the leader Yamarza, and will order to clear the cave with his sanctuary from the giants. The place we need is the Yellow Stone Cave, northeast of Riften. Yamarz will go there on foot, but it is better to go there on your own.
In the cave, the behavior of the orc leader will become quite comical. Yamarz will be terribly cowardly and persuade us to do all the dirty work for him. If the giants do not kill him, then at the sanctuary of Malacath he himself will attack us in order to get rid of the witness of his cowardice.
Take the hammer from the giant's body and return it to the tribe by placing it on the altar. It is now called Volengrang and absorbs the stamina. This is our reward.

Dawn Dawn (Meridia)
The quest begins when a strange-looking ball falls into our hands - the guiding star of Meridia. But he meets by chance, and you can look for him for a long time, so it’s more reliable to visit the statue itself. It rises above the road leading to Solitude (south of Wolfskull Cave, where Potema was summoned).
Meridia will show us where to look for the guiding star. Find it and, returning to the rock, put it on the altar and receive instructions from the Daedra mistress. We need to go to the Kilkreath dungeon (the entrance is right under the statue) and kill the necromancer Malkoran.
The dungeon is simple, but interesting, in the spirit of Indiana Jones. We need, by activating the pedestals with a chain, to send the beam sent by Meridia through all the catacombs, while opening the door behind the door. The battle with Malkoran will be about two stages - first with himself, then with his shadow.
Reward - Radiance of Dawn, a sword with a very unusual, although not very convenient effect: from time to time it not only kills the enemy, but turns him into ashes, and when the undead die, it gives area damage, which scares away the remaining undead.

The dog is a friend of the Daedra (Clavicus Vile)
There are rumors in Falkreath that the blacksmith Lod is looking for a certain dog. Go to Lod and get meat from him to lure the dog. We will find him, but suddenly it turns out that this is Barbas, the companion of the Daedra lord Clavicus Vile. Barbas ran away from him.
Barbas wants us to go to Heimar's cave and find the sanctuary of the former owner. There are many vampires inside the cave, so if you are not very confident in your abilities, let the dog go ahead. Clavicus, in turn, will demand that the Ax of Sorrow be returned to him in the Frost Cave. It's a small cave, and its only inhabitants are the mage and his fire atronach.
When we return the ax, Clavicus Vile will offer us to keep the ax for ourselves on one condition - we must kill Barbas. If we agree, we get an ax that damages the stamina. If we refuse, Barbas will join the owner on the pedestal, and we will grab a very useful Clavicus Vile mask that improves prices and eloquence.

Waking Nightmare (Vermina)
Something strange is happening in Dawnstar - all the inhabitants have the same nightmares at night. What's happening? The priest of Mara, the dark elf Erandur, knows this. He will tell you that heavy dreams are a sign of danger: their memories are being stolen by the Daedra princess Vermina. To save Dawnstar from trouble, he will lead us to the temple of the Nightcallers, from where evil comes.
There are bodies all over the temple. But they are not dead, but sleeping. The priests of Vaermina, unwilling to surrender to the invading orcs, released their magical miasma and put themselves to sleep along with them. To stop the dream and end Dawnstar's nightmares, the Skull of Corruption must be destroyed. How does Erandur know this? He used to be a priest of Vaermina, but escaped from the tower at the last moment.
An impenetrable barrier prevents you from reaching the Skull of Corruption. In the Library you will find the book "Dreamwalking", from which you will learn about the potion "Vermina's Apathy", which allows you to go into dreams and in this way move in space. Go find a potion. Along the way, eliminate the awakening inhabitants of the tower - they are all a little out of sorts while awake.
After drinking the potion, you can return to someone else's past, complete the task (pull the chain and release the miasma) and go back. You will find yourself on the opposite side of the barrier. Remove the soul stone from the pedestal to remove the barrier and let Erandur through.
It remains only to take part in the battle with his former colleagues and make the final choice - let Erandur destroy the Skull of Corruption or kill the priest at Vermina's instigation.
Staff Skull of Corruption is an interesting artifact (at least it scares the guards), but its effect is normal damage. The damage is increased if you recharge the Skull next to sleeping people.

Black Star (Azura)
Shrine of Azura, the only shrine with a normal-sized statue, is set high in the snowy mountains south of Winterhold. Rumors about him go around Skyrim, so it will quickly appear on the map.
In the sanctuary itself, the priestess Arania will immediately send us to Winterhold, in search of the high elf Nelakar. The elf lives in the Frozen Hearth tavern. He will tell you that his master Meilin Varen is conducting sinister experiments with the divine artifact, Azura's Star, trying to achieve immortality. Whether he succeeded or not, the artifact must be returned from the Ilinalta Depths dungeon.
After making your way through the hordes of necromancers, take the Star of Azura from the cold corpse of Meilin. There was only one question left - to whom to return it? If we return the artifact to Azura, we will be rewarded with a regular reusable container of souls for any size. If we return Nelakara, we will get the Black Star - an artifact for the souls of sentient beings. Since all intelligent souls are Great, the second is clearly more profitable.
However, before you can use the Star, you will have to endure a very difficult battle with Meilin and his Dremora hiding in it. Dremora are very dangerous guys, especially at early levels, and you won’t have any companions inside the artifact, so arm yourself to the teeth, stock up on “first aid kits” and fire protection.

|
Vighar in the Bloody Throne. |

Fast Track
- Talk to Dengeir .
- go to Blood Throne .
- Destroy the vampire Vighara .
- Notify Dengeir of Vighar's death.
Detailed walkthrough
Dark Ancestor
After completing the quest Small theft when you find the missing personal letter for Dengeir, he will trust you enough to entrust you with a very important and personal matter, causing him great concern and embarrassment, since his ancestor Vighar was in fact once a vampire. For many years, Vighar was magically bound in his grave, but over time, the magical powers weakened and allowed him to escape. During a conversation with him, he will embarrassingly entrust you with a family secret:
"Perhaps you have already seen an open grave in our cemetery. People in the city believe that grave diggers worked here ... But the truth is much less pleasant. It ... was the grave of Vighar, my ancestor, who had died for many centuries. It's my family's duty to keep him underground, but someone stole the ward stone and Vighar managed to escape."However, Dengeir does not want to return his ancestor to the grave, but simply wants to destroy Vighar.
"No, the ward stone is no longer useful. Now Vighar will have to be destroyed. If anyone finds out about this, the family will be disgraced."Dengeir will also tell you that he tracked down his vampire lair. Blood Throne and wants you to go there and destroy him before anyone discovers this disgrace to his family.
Blood Throne
The Throne of Blood is a military fort hidden in the mountains southwest of Helgen. Get to Helgen and follow the road heading south. Keep an eye on the marker on the map and make sure you turn the right way around corners; never deviate from the road as this will lead directly to the fort. From the outside, the fort is unguarded, so you can easily climb the stairs and enter inside.
Once inside, you will be greeted by the sounds of howling wolves along with a trap stove that sets off a fire trap right in front of the entrance. Use stealth mode and go forward. Soon you will meet two leveled vampires; win the battle and go down the stairs to the big hall. Move east and fight another vampire who will feast on severed hands in the dining room. Next, move through the snow tunnel, which will lead you to another huge hall with a large wooden structure and more vampires, along with wolves. Climb the wooden stairs to the top, there you can use, if necessary, the Pentagram of Souls, and in the next tunnel the Alchemy Lab. Then explore the bedroom and collect some loot, in the same place you can go to the next room, where there will be a book of skills on the table Incident at Necrom Illusion and a random enchanted dagger. Head to the snow tunnel heading south and cross the bridge that will lead you to the last room, Vighar's lair.
And last...
Vighar chose his lair in the farthest hall of the fort. Entering this hall, you will find yourself in a room resembling an arena. On the sides of the hall there will be several cells, with hungry and angry wolves. In the farthest place from the entrance, the vampire Vighar will sit on a high pedestal and talk with one of the inhabitants of the fort:
Vampire: "And who is this?"
Vighar: "Doesn't matter, this fool will be the next number on the program."
With these words, Vighar will pull the handle of the lever located next to him and at the same moment several wolves will be released from their cages. He will watch coldly while you fight them. As soon as you manage to kill them, Vighar himself will jump down and attack, reinforced with his henchmen. When it's all over, find the chain in the western niche and pull it up in order to climb up. Follow the nearby chest and take some good loot, remove the bolt on the door, and get access to the initial huge hall. Exit the fort and return to Dengeir for your reward.
Note
- Vighar is a very powerful vampire, on par with the Master Vampire or Volkihar Master Vampire. It will replace the normal boss at the end of the dungeon.
- This quest will become unavailable if Dengeir becomes the Jarl of Falkreath.
- If you have Dawnguard installed, statues of three hostile gargoyles will appear in the Bloody Throne and the dire wolves will be replaced by Deathhounds.
Bugs
- Dawnguard can only add gargoyles and will not change wolves to deathhounds.
- At times, even if the quest has been started, Vighar may not appear. Instead, the dungeon's final boss could be a random high-level vampire who is supposed to be there if the mission didn't work. Such a replacement will prevent the quest from being successfully completed, although Dengeir will act the same as if you killed his ancestor and won't notice the difference.
Quest stages
- The following empty quest steps were not listed in the table:
- FreeformFalkreathQuest03: 0, 10.
- FreeformFalkreathQuest03B: 0, 20.
Notes
- Any text in angle brackets (for example,
- Not all of these entries may appear in the game log: which entries appear and which do not - depends on how the task is performed.
- Stages are not always listed in order of completion. This tends to happen with tasks that have multiple possible outcomes, or where certain tasks can be performed in an arbitrary order.
- If the entry is marked as " Completion of the task", this means that the job is removed from the active list, but new stage entries for this job may continue to be added to the log.
- When playing on a personal computer, you can use the console to advance through the task by entering the setstage (((ID))) stage command into it, where quest is the in-game task ID, and stage is the stage number to go to. However, it is not possible to proceed to uncompleted (i.e., skipped) quest stages. However, using the resetquest (((ID))) console command, you can reset the quest stage.
Your first goal is to find the priest's knife (Moth Priest's draw knife), its location is indicated on the map. We go to a place called Ancestral Meadow ( orig. Ancestor Glade). The fastest way for those who have already explored Skyrim well is to travel to Helgen and then through Falkreath to the cave we need. On the way you will meet the Guardians of the Dawn and small groups of bandits.
Glade of ancestors
If you and your companion went to the cave separately, you will meet Serana inside anyway. Once in the cave, make your way along the fallen tree that lies above, very soon a large illuminated cave will appear in front of you. At the bottom, next to the red tree, you will find the knife you need. After scraping the trees, you will also need to collect the Ancestor Moth that fly around the main character. After collecting 7 copies, you can read the Elder Scroll.Elder Scroll
Returning to the place where you picked up the knife, open the Scroll in your inventory and very soon you will see a conditional map. When the effect of reading has passed, Serana will contact you with a question about Uriel's Luke ( orig. Auriel's Bow), to which you reply "It's in a place called Darkfall Cave". Having learned your next target, get out, very soon you will be attacked by several Guardians of the Dawn.No matter how trivial it is, but the whole plot is tied to prophecy. It so happened that the events preceding and occurring at the time of the appearance of the main character in the world Skyrim, almost completely coincide with this very prophecy. The latter says that the greatest of dragons will soon appear - Alduin, after which all those who were not lucky enough to be born a dragon will have to become dead, and in general, a pitch-black Armazdian will come.
Concerning events proving the entry into force of the prophecy, then this is nothing more than Civil War that began between the Empire and the Stormcloaks. So call themselves all driven Ulfric Stormcloak, who by the way killed the previous king of Skyrim - Toruga. After that, full-scale hostilities began between these two factions.
An introductory course on quests and working with the Skyrim magazine
In the fifth part of the scrolls, the mechanics of the journal and the passage of quests were slightly rendered, that is, they were made simpler and more understandable for a larger number of the public. It has become quite easy to work with tasks that even a child can handle, with the exception, perhaps, of a couple of three quests. All you need is open magazine ("J" key default), then click on the right task and close this interface.
After these manipulations top of the screen, where the icons of the cardinal directions and the nearest settlements, including dungeons, are displayed, you will see marker in the form of a triangle with a rhombus at the top. This is the direction in which you need to move in order to complete the selected quest. You will see the same marker when you open the map ( "M" key default). It is worth noting that when choosing in the journal multiple tasks, you will also get several markers, which is not so convenient in some cases.


Passage of quests
During passing main questline you will go from simple prisoner before savior of the world, destroy more than a dozen dragons, and also get one of them as a means of transportation. In general, a series of games The Elder Scrolls one gets the impression that in order to save the world, it is necessary to be a prisoner, but oh well.
Skyrim has difficulty level adjustment, which you can find in the game settings.
Quest "Freedom!" - Acquaintance with the harsh Skyrim
The action of the game starts in a wagon where you are with others prisoners Imperials. From the dialogue with fellow sufferers, you will learn that you are being taken straight on the chopping block. What, any control functions are not yet available, except for the rotation of the camera, so you have no choice but to look around and enjoy the beauties of the game.
After arriving at the place of execution, one of the Imperials will contact you, the dialogue with which will turn into character Creation. The editor presents quite a few options for choosing the appearance Main character(heroines), so you can hang out here for a long time. Having decided on the appearance of the savior of the world, you are invited to go straight to the chopping block, then all the attempts to create a character would crumble under the executioner's ax, but by a funny coincidence, the Protagonist is saved from inevitable death by a suddenly appeared the Dragon.
So the timely arrived reptile begins destroy the village, after which, of course, it is no longer up to the execution of prisoners. Taking advantage of the turmoil, you need to leave this place that is not friendly to the Hero. There is nothing complicated here, for starters, just follow the character with marker overhead to the nearest tower. Continue up the stairs, and then jump over to the nearest building through the hole in the wall made by the dragon. At the exit from this building you will meet an already familiar Imperial soldier, you should not immediately run wherever your eyes look, wait out the dragon's attack and follow the imperial.
After a short flight from the dragon's attacks, you will have the choice to go to the tower for Hogwarts(Imperial soldier), or Ralof(Brother Storm).
- Followed the Stormcloak- In the tower, you will be attacked by Imperial soldiers, and after escaping, you will need to proceed to riverwood to Ralof's sister.
- Followed the Imperial Soldier- In the tower you will be attacked by the Stormcloaks, and after escaping you need to proceed to riverwood to the blacksmith Hadvart.
From the dungeons of the tower you will descend into cave, after wandering a little along which with your companion you will finally get to freedom. On this cheerful note, this quest will end.
The quest “Before the Storm” is bad news for Jarl Whiterun
After you and your companion leave the cave, an entry will appear in the diary that will mark a new task entitled " Before the storm“. Its essence lies in delivering news of the dragon's attack to Jarl Whiterun.

Directly at the exit from the cave, Hogwart or Ralof, depending on who entered the fortress, will advise you to visit a village called riverwood. It is located in the northeast of your location. However, first you need to go to riverbank to the northwest and choose a sign for yourself - a thief, magician or warrior. This will allow you to learn the relevant skill groups twenty percent faster. After this manipulation, you can safely continue the journey and head to Riverwood.
Upon arrival in Riverwood, proceed to the house:
- Blacksmith Alvor, if Imperial Soldier is chosen Hogwarts, you will find his house in the northern part of the village.
- move and Gerdun, if you chose Stormcloak Ralof, you will find their house in the southeastern part of the village.
On this action, the non-linearity of the main story quest will end. Both NPCs will send you to Jarlu of Whiterun, you will find this city to the north of Riverwood. At the entrance to Whiterun, a guard will meet you, tell him that you must inform the Jarl of an important news about the dragon attack and he will let you inside.
Once in Whiterun, head northeast to Dragonreach and inform the jarl about the dragon's attack, after which you will complete this quest.
Windy Peak - Search for Dragonstone in an ancient Nordic temple
After you inform Jarl Balgruuf the Elder, about the dragon attack, he conferred with his advisers will take you to Farengar Secret Fire, a local magician at court. The latter will ask you to find some dragon stone. According to Farengar, this stone is found in an ancient Nordic ruin called windy peak.
Windy peak you will find on southwest from whiterun, just follow the direction marker at the top of the screen. I would like to note that if you did the side quest “ golden claw“, which can be obtained in Riverwood and explored Windy Peak to the end, then most likely you will already have the Dragon Stone, in this case, just give it to Farengar and complete the task, but if you have not done such manipulations, then you are welcome to proceed to windy peak.
Reaching the aforementioned nordic ruins, move into their depths, simultaneously destroying the enemies who encroached on your life. At the first levels windy peak you will only meet bandits, however, as you go deeper, you will encounter spiders and draugs. In general, everything is according to the standard of the genre, "the farther into the forest ...".
Check locations carefully collect everything of value, at the initial stage of the game, money will be very useful to you.


First puzzle on your way there will be an uncomplicated mechanism in the form three revolving pedestals and a locked cage with a lever in front of it. If you look closely at the puzzle room, you will see that over the cage the same patterns are located as on the pedestals, though one of the stones with a similar pattern collapsed, but still you can see what was knocked out there. Remembering the order of the patterns, turn rotating pedestals in the same position and pull the lever, if you did everything right, then the grate will open.
Keep pushing deep windy peak and soon you will stumble upon a web that blocks the way further, just chop it up, or destroy with a spell. After that, immediately prepare for battle, you will be attacked huge spider, after defeating which, you need to free the bandit caught in the web, you will see him immediately behind the defeated spider. You should not relax, the bandit will immediately begin scoot from you, so do not hesitate and finish him off, along the way taking from his lifeless body golden claw. If the bandit is still ran away do not be discouraged, having gone a little further, you find his corpse.
Continue your journey into the depths of the ruins. After defeating many draugs, you will stumble upon arch type door, in the center of which are embedded three stone circles with drawings. Each of the circles can be rotated. Open inventory, click on the Golden Claw and scroll with the mouse wheel, in the palm of the golden claw you will see the order in which the patterns on the door should be. After that, click on the circle in the middle of the door and it will open.
Move on until you find a huge burial hall, and there is a wall with By the word of power. Approach it and study the corresponding word, by doing this you will witness how from the sarcophagus Draug breaks out, defeating the last take away from him dragon stone.
Carrying the Dragon Stone Farengar and talking to Jarl of Whiterun you complete the quest and get a random piece of armor as a reward and the opportunity to purchase house in whiterun.
The task “Dragon in the sky” is the beginning of the formation of Dovakin
After talking with Farengar you will witness how the huskal of the Jarl of Whiterun informs the court magician that there was dragon spotted. Airileth, that is the name of the Khuskala girl, will ask you to follow her and discuss the plan of further actions with the Jarl. Well, it would be said. Follow Airileth to Balgruuf.
For a long time to discuss what the top of Whiterun will not do with this dragon. You will be sent along with the aforementioned Airilet to tower near the city, which is located on southwest from Whiterun. In general, the jarl will mention that this is a reconnaissance mission, but we know that. Go to the tower and find the Khuskala Airileth there.
When you arrive, you will find ruined tower who was attacked by a dragon. Airileth will order everyone to spread out and explore the area. go inside the tower, a guard will run out to meet you and say that the dragon is still somewhere nearby. After a short period of time, the dragon will return. Now it's not about talking anymore. Deal with the flying lizard, by the way legendary level the complexity of doing it will not be so easy. The main thing avoid dragon attacks, and attack yourself at a time when it is occupied by guards and you will succeed.
You defeated the dragon consume his soul. Your first shout will be learned automatically, you just need to open the magic menu, go to the shout section and select the appropriate one. Then press the key C” and you will see your new ability in action.
Having dealt with all the difficulties, go to whiterun to jarl and report on the work done, thereby completing the quest " dragon in the sky". Balgruuf will give you the title of Thane, and he will also reward you with his own huskal, Lydia.
"The Way of the Voice" - 7000 steps on the way to the top of the world
After defeating your first dragon and entering Vaytra, you will hear a loud voice saying “Dovakin” - this is nothing more than call of the Greybeards. Speak to the Jarl of Whiterun Balgruuf who will advise you to go straight to High Hrothgar, where you can begin to comprehend the teachings of the Greybeards on voice control.
Way in High Hrothgar lies through the village Ivarstead where you need to go. The road is not close, so stock up on the necessary potions and supplies. Before Ivarstead you will see a stone bridge, passing through which you will enter the path of 7000 steps - the road to High Hrothgar.
Traveling through the expanses of Skyrim, collect all the ingredients you see, so you will most quickly pump your alchemy skill

Moving along this ladder, you will meet many enemies on your way, the variety of which depends on your level. Having reached the cherished goal, enter inside Hrothgar, one of the Greybeards will come to meet you - Arngeir. He will ask you to prove that you are Dovahkiin, just activate the studied cry on him, and the check will end there.
After a short briefing, you will be taught the second level of shouting. juggernaut. Having learned the wisdom of this thuum, you will have to pass a short exam. To do this, activate the shout, on the three illusions created by the Greybeards. Focus on what you need hold down a key in charge of screaming until he recharge and then let her go.
After demonstrating your skill, go for Greybeard Borri to the courtyard of High Hrothgar, where you teach a new cry, entitled " Whirlwind, swift dash". After that, you must pass another exam, where you must show how you mastered the new thuum. All that is needed is to have time to activate the word of power, while open gate, it will not be difficult, so I think you will easily pass the test.
Having overcome these two exams, talk to Arngeirmo, thereby you complete the walkthrough quest "The Way of the Voice" and get the next task.
Skyrim passage of the quest “Horn of Jurgen”
After passing two exams, Elder Arngeir of the Greybeards will entrust you with the last - the third test. You need to go to the ancient Nordic ruins of Ustenegrev and get there juergen's horn.
Ustenegrev is located in the northwestern part of the map. If you haven't been to those places yet, use fast travel to Whiterun, and from there on a wagon go to Morphal, Ustenegrev is located near the northeast of this city. Once in the ruins, you will encounter necromancers, draugs and frost spiders, who naturally are not happy with you and will try with all their might to send you to the next world. However, they will not be the main obstacle at all. The fact is that on the way you will come across some kind of puzzle, which is three magic stones and gratings behind them. As you pass the stones, you will notice that the gates open, but as soon as you pass the last stone, they almost immediately close. Required in mode sprint(key alt by default) run past the stones, and then immediately activate the word of power called “ dash”, thus you will move behind the bars and they will no longer close.
In the room with three stones that open the bars, you will find a wall with the word of power.
Going further into the depths of the temple, you will stumble upon trap in the form of floors emitted fiery jets. Here again, the “Dash” cry will help you, using which you can easily overcome this difficulty that has arisen on your way.
In Jurgen's tomb itself, only disappointment awaits you, because what you are looking for there is no horn, and instead you will find a note. In addition, this quest will go to the failed section, but don't be alarmed, everything is as intended. After reading the found note, you will learn that Jurgen, who is ahead of you in search of the horn, is waiting for the Main character in Riverwood, or to be more precise in the tavern " sleeping giant". Go there and talk to Dolphin, saying at the same time that you want to rent a room in the attic. Delfina will answer that they do not have a room in the attic, but she understands what is the matter. After talking to her, move to the room located on the side of the entrance to the tavern (northwest part of the building). Delphine will follow you and give you Horn of Jurgen, then you need to return it to Arngeir in High Hrothkar.
Having received Horn of Jurgen, The Greybeards will teach you the third word of the shout juggernaut and proclaim Dovahkiin, after which the quest will end.

Quest “Blade in the Darkness” – acquaintance with the secret Order of Blades
Exercise starts after the Sleeping Giant in the Riverwood Tavern, Dolphin will give the Protagonist the Horn of Jurgen.
Follow Delphine to her secret room, where she will tell that she has been looking for the Dragonborn for a long time, since only people endowed with this rare gift are allowed to completely kill dragons, consuming their soul. After explaining to the main character what they want from him, Delphine will ask you to show in practice how the protagonist absorbs dragon souls and make an appointment in Grove Keane.
Keengrove is located south of Windhelm, if you haven't discovered those lands yet, do fast travel before whiterun, and from there on a wagon go to Windhelm. When you arrive at the meeting point, a girl named Iddrit will run up to you and tell you that a dragon has just attacked their settlement. After talking to the terrified woman, head northeast from Kynesgrove to dragon burial place. When you get there, you will witness how Alduin raises his fellow dragon from the dead Saloknira.
After the heroic victory over Saloknir talk to Delphine to complete the quest " Blade in the dark».
"Diplomatic immunity" - all about the plans of the Thalmor
You start this is a quest after you defeat the dragon Saloknira and talk to Delphine. The latter believes that they are responsible for everything that happens. Thalmor who are pursuing their own goals.
Delphine's Blades agent offers to meet her at Riverwood where you need to go. You will find the dolphin in the tavern " sleeping giant“. According to her, she found a way to get into the Thalmor embassy and find out more about their plans. You also need to move to Solitude and in the tavern "Laughing Rat" to find an ally of Delfina - Malborn.
After handing the equipment to Malborn and listening to his offer of help, give him necessary things that you will need at the embassy. Malborn will return this ammunition when you get to the Thalmor and meet with him. next step there will be a meeting with Delphine, who is already on the Katla farm, located not far southwest of Solitude. Give Delphine the rest of your equipment, which can only be picked up after end of the quest. Then take from her smart clothes and dressy boots. Done, now you can safely move to the Thalmor embassy and find out what they are up to.
Upon arrival, tell the embassy guard invitation and go inside, where a high elf will approach you Elven and start asking questions, however, Malborn will distract the curious woman and you can safely go to the reception. Next you need to somehow distract guests, in order to quietly leave this Thalmor party and continue to carry out their plan.
Depending on what interventions you have already made in the game world, there will be distractions attention.
- Perhaps the most simple and affordable way is to take it from Malborn or from any maid booze and then give it away redgar razelan. The latter, having received alcohol, will distract the public with his behavior and you can calmly leave reception.
- The second way is no less easy. Talk with Erikur, after which it will start approach the maid, which will give him a lapel-turn. Offer Erikur your help in seducing the maid who refused him. However, you will not be able to convince the maid of any connection with Erikur. But do not despair, go back to Erikur and say that the maid agrees and waits. As soon as Erikur approaches the maid and begins to harass her again, go to Malborn and quietly leave the reception.
- If you completed the Ondolemar quest "" in the city of Markarth Search and arrest", then Ondolemar will agree to help you in diverting everyone's attention to yourself, and you can leave the reception unnoticed.
- East Empire Company employee Orth Endario will help you if you have completed his task " The sun rises in the east».
- Elisiv the Fair will respond to your request for help if you hold the title Thana Haafingara.
- Having a well developed eloquence skill Talk with Vittoria Vici and ask her to distract the attention of the guests, after which she will put on a small performance, and you will quietly leave the reception.


After distracting guests follow Malborn to the pantry and pick up the things that he was supposed to bring to the reception. Next, go to the door against the chest and then, as your heart desires, you can bring down everyone, or you can play a spy. However, the goal is still the same - Search what the Thalmor know about dragons.
Exit to the courtyard of the Embassy and follow in Elven's private quarters. Entering the building you will be attacked by two guards, one of them will have interrogation chamber key, take it, by the way, exactly the same is located inside the chest in the northwestern part of the building.
After receiving the key, go to thalmor embassy dungeons, the entrance is in Elven's Private Quarters. In the torture chambers you will find a captured Breton Etienne, talk to him and find out what he knows. The prisoner will tell you that the Thalmor do not possess no information about the appearance of dragons, however, they are looking for Blade by name Esbern, which you can find in Riften.
It's time to leave the inhospitable Thalmor, freeing Etienne you will witness how in the dungeon guards break in, it turns out they captured Malborn and demand that the main character surrender, but it's too late to turn on the back. Calm down the guards and take the hatch key from the body of one of them, with which you can leave this casemates.
After leaving the Thalmor embassy, travel to riverwood and talk to Dolphin. Tell her that the Thalmor are looking for a certain Esbern, after which you complete the walkthrough quest "Diplomatic Immunity".
"A Cornered Rat" - Esbern's Quest
Quest will begin as soon as you tell Delphine about what you learned at the Thalmor embassy. The main task in this quest for you will be to find another agent of the Blades - Esberna.
You can start the task several ways.
- Go to Riften and look for a character by name Brynjolf who is in the tavern" Rampant Flask", or in the tavern" bee and sting", on either market square and ask him where to find Esbern. In this case, you need to complete the quest for Joining the Thieves Guild.
- If you have developed the skill of eloquence, then about Esbern you can learn from Kirava in the Bee and Sting inn, or with members of the Thieves Guild, in the Ragged Flask inn.
- On one's own will go to the tunnels under Riften, the location is called " rat hole”, and find Esbern hiding there.
You can get into the “Rat Hole” through the door located on the lower levels of the city, almost at the very water. The dungeon can be divided into four levels.
- On the first there are robbers and several Goldrats - feel free to get rid of them.
- On the second level are members of the Thieves Guild. Here you need to talk to Weskel the Warrior and find out from him exactly where Esbern is.
- On the third level, you will be met by agents of the Thalmor, you can also not stand on ceremony with them.
- On the fourth level you will find Esbern.
After you get to the character you are looking for, tell him passphrase and he will open the door for you, and then share the information he has. After talking to the hidden agent of the Blades, you will complete this quest.
Skyrim passage of the quest “Alduin's Wall”
The quest begins after you talk to Esbern about what this Blades agent knows about dragons. Next you need take Esbern to Riverwood, the Sleeping Giant Inn. It is worth mentioning that at the exit from Esbern's room in the Rat Hole, you the Thalmor will attack, the battle with which, in other matters, should not be any particular problem.
Overcoming the troubles that arose along the way and back in riverwood to Delphine, you will witness the meeting of old acquaintances and Esbern's long story about Alduin's Wall. Also, a new acquaintance will tell you that this wall can be found in Sky Haven Temple where you need to go immediately.


When you reach the indicated place, you will encounter many Outcasts, who have set up camp here and whom you will certainly have to deal with. After that, on the way you will come across two puzzles.
- First puzzle consists of three rotating stone pedestals that need to be rotated so that everyone can see Dovakin's sign, you will see it in the screenshot. After that, the bridge should fall and open the way for you further.
- Second puzzle these are floors with push tiles. Stepping on the wrong slabs will activate fire trap. To prevent this from happening, step on the plates with the sign of Dovakin. After reaching the end of the room, pull the ring and turn off the trap.
After overcoming the puzzles, you will enter the hall with Blood Seal, which can only be activated by the blood of a dragonborn. Once again proving that you rightfully call yourself Dovakin activate printing and open the passage to Alduin's Wall.
In the room with Alduin's Wall you can find the Blades armor and the unique one-handed sword "Dragonbane".
Exercise will end after Esbern explains to you message meaning on the wall and a subsequent conversation with Delphine.
Quest “The Throat of the World” - a conversation with the elder of the Greybeards
Quest starts after talking with Delphine in Sky Haven Temple. Upon learning that Alduin can only be defeated with a special shout, the Blades agent will send you to High Hrothgar to the Greybeards.

Arriving at the guardians of the doctrine of the voice, talk to Arngeir and find out about a scream that can defeat an opponent as strong as Alduin. It is important to tell Arngeir the truth about how you learned this way of fighting the dragon - the Time Eater.
To your dismay, Arngeir confesses to teaching you the necessary word of power they can not, the cry, by the way, has a sonorous name " dragon slayer". The fact is that in order to pronounce this tuum, you need to take into yourself all the anger that those who created it experienced back in the days of the persecution of the cult of dragons, therefore the Greybeards do not use it.
Ask Master Arngeir more about Dragonboy, and after a short explanation, he will advise you to contact Elder of the Order of the Greybeards- Paarthurnax. After finishing the dialogue, follow Arngeir to the courtyard of High Hrothgar, where he teach I'm crying out to you Clear sky". With this tuum you dispel ice storms blocking the path to Paarthurnax and you will be able to meet him.
Reaching the top" Throats of the World” Talk to Paarthurnax while observing all ancient customs. There is nothing complicated, the elder of the Greybeards himself will conduct a dialogue in the right direction. The end of the acquaintance will be the use of the cry “ fire breath". After that, it's time to ask a new friend about how to learn the shout "Draknoboy" you need. However, even here the Protagonist will fail - Paarthurnax does not know this thuum, but not everything is so bad. Friendly dragon offers will go to the past and learn Dragonbreaker at the same time that this thu'um was used to fight Alduin.
After talking with Paarthurnax, you can empower him with one of three shouts:
- Fus- Ruthless force.
- fime- Incorporeality.
- Yol- Fire breath.
To travel back in time, you will need an Elder Scroll, which will help you find Greybeard Arngeir or Agent Blades Esbern.
"Ancient Knowledge" - in search of the scroll of the Ancients
Exercise starts after talking with Paarthurnax- by the elder of the Greybeards, who will tell you where the Main Character can learn the “Dragonbreaker” cry. According to Paarthurnax, the protagonist needs to find the Elder Scroll and use it to travel to the past, where the knowledge of the desired thu'um is still preserved. To find out more about ancient scroll you need to choose to speak with an agent of the Blades Esburn(at Alduin's Wall), or with Greybeard Argeir(High Hrothgar). In general, there is no difference, both NPCs will send you to College of Mages of Winterhold. To get inside the guild, talk to Faralda, who will offer to pass a simple exam on, however, if you say that you are a Dragonborn, you will be let in after you demonstrate the use of any cry.
The task "Beyond the ordinary" is directly related to the completion of this quest.
Next, go to the library keeper - Orc Urag. Ask him about the Elder Scroll, the orc will share information only if you say that you are Dovakin. Having found the necessary books, Urga will put them on the table nearby, reading is called " " and " Impact of the Elder Scrolls". Read the book “Thinking of the Elder Scrolls”, after which the quest “Beyond the ordinary” will begin, during which you will find ancient scroll.
Skyrim passage of the quest “Beyond the ordinary”
After reading the book Meditation on the Elder Scrolls” ask Urag about this hard-to-read tome, after which Urag will talk about the author of the book by the name Septimius Segonius and where to find it. Head north from the Winterhold Mages Guild, Septimius is located in the Septimius Post of the same name.
Guided by the advice of Septimius, move to southwest from winterhold to ruins Alftand, then go down to Animatorium, and from there to Alftand Cathedral. Here you need to find the Dwemer Mechanism, by activating it, you will open a passage to Black Limit. Once inside Blackreach, look for the entrance to Mzark tower, the marker will not let you get lost.
Mzark Tower is a corridor, at the end of which there is a semi-spherical room with a huge mechanism. You need to go up to control panel this mechanism and insert the cube given to you by Septimius in vocabulary stand- right stand. Now you need to right order press the remote control buttons, there are four of them in total, the middle rack is apparently something like a screen.

In order to receive scroll, click:
- four times per third button- hear the click made by the dictionary stand
- Twice per second- the first button will open
- Once per first– a flask with an Elder Scroll will appear
Having received ancient scroll, you complete the quest “Ancient Knowledge”, however, to complete the task " Beyond the ordinary”, which, in principle, is no longer so important, it is necessary pick up Dictionary of Septimius from the Vocabulary Stand and give it to the owner. Then Septimius will tell you that he is looking for the Daedric Prince Hermaeus Mora and will ask you to get the blood of the elves, one sample of each type. At the exit from the Post of Septimius, Hermaeus Moru himself will turn to the Hero and say that he will speak with the Main Hero again after completing the task of Septimius.
After collecting the blood, give it to Septimius, after some manipulations, he will open the Dwemer cube, located in his cave, in which you will find the book “ Oghma Infinium” and complete the quest “ Beyond the ordinary».
Quest "The Curse of Alduin" - the first battle with the strongest of the dragons
Exercise starts after you get to Mzark tower Ancient scroll. You need to go to the location of the Throat of the World to to Parthurnax. The latter will indicate the place where you need to read the scroll.
Open inventory and use ancient scroll, after which the main character will be transferred to the past. You will not be able to perform any actions with the game world there, so just watch. Upon returning to the present, a new shout will be added to you " dragon slayer”, as well as the problem in the form of Alduin who attacked the protagonist.
At battle with Aludin use your new thu'um on it dragon slayer, which will cause the dragon to land, Alduin himself does not mount the serpent. After you bring the enemy's health to a certain level, he will fly away, and you complete this quest.
"Fallen" - the captivity of the dragon and the world in Skyrim
Exercise starts after you first time defeat Alduin in the location “The Throat of the World”. You need to find out where the defeated dragon went.

First of all, you need to talk to choose:
- With Paarthurnax- you will find it in Throat of the World.
- With Arngeir- is in High Hrothkar.
- With Esbern– studies Alduin's Wall in Sky Haven Temple.
Any of the above NPCs will send you to Whiterun to Jarl Balgruuf the Elder, since it is in this city that there is an opportunity capture dragons who probably know where to find Alduin.
Apparently for some political reasons, Jarl Balgruuf will refuse to help the Main character until he achieves making peace between the warring sides of Skyrim, and this, as you probably already know Stormcloaks and Imperial Legion.
If you have already chosen a side and ended the war in Skyrim, you can start capturing the dragon, more on that below, if disagreements between the Empire and the Stormcloaks not settled, then first you need to complete the quest " Endless time».
Quest "Endless Time"
Place for reconciliation warring parties will become High Hrothgar so the first thing you need to do is talk to Arngeir, who, having inflated his own worth a little, will agree with the role assigned to him.
After you deal with Greybeard, go:
- To Solitude, here you need to find General Tulia, he leads the Imperial Legion's forces, and send him to the negotiating table.
- To Windhelm, here you need to come to Ulfric Stormcloak, who dominates the Stormcloaks, and also send him to the negotiating table.
In addition to the Heads of the warring parties, already familiar Agents of the Blades Esbern and Delphine, as well as representative of the Thalmor Legion- Elenwen.
As soon as all the invitees and not very gather in High Hrothgart, talk to Arngeir and take your seat at the negotiating table. During the negotiations themselves, the Protagonist will have a lot of answers to the questions posed. However, whatever it is, the world will enclosed in any of the scenarios. The only difference is further factions to the protagonist, as well as what vestments will remain for the Empire, and which ones for the Stormcloaks.
After making peace, talk with Esbern that will teach you a new cry " Call of the Dragon", if before the start of the quest " Fallen”, the civil war was over, then you will be taught how to cry Paarthurnax.
After learning the desired thu'um, go to Dragonreach and talk to Jarl Balgruuf, you need him to start construction of a trap for the dragon.
After all preparations, head to Dragon's Limit Gallery and using the shout " Call of the Dragon” , summon Odahviing. It is clear that he will not fall into a trap by himself, so you will have to use a shout on him “ dragon slayer” and gradually retreat deeper into the Gallery. Once Odahviing gets close enough, the trap will slam shut, and you can calmly discuss with the dragon all your questions.
Quest "House of the World Eater" - in pursuit of Alduin
Quest starts after the dragon Odahviing tells where Alduin fled. You need to ride a dragon to go to the temple of Skuldafn, and from there go to Sovngarde.
After talking with Odahviing, go up to the upper tier Galleries of Dragon's Reach and release captured dragon, you can pull the lever yourself, or you can ask the guard. Then speak again with Odahviing, who will keep the deal and will take The main character to the temple of the Cult of Dragons Skuldafn. After landing, the protagonist immediately expects a fight with draugs and dragon, so get ready for a grueling fight. The draugs methodically fire at the hero from the other side of the bridge, so it's more logical to deal with them first, and only then defeat the dragon.
On the way to the portal to Sovngarde, waiting for you three puzzles:
- FROM first puzzle you will encounter in the second room of the Skuldafn Temple. She represents herself three rotating cabinets and a lever behind them. If you carefully inspect this room, you will see that on the walls next to the extreme (left and right) cabinets, as well as above the two bars in the front of the room, patterns are inscribed. Just turn the end cabinets in according to patterns, and then, depending on which grate you need to open, and a cabinet in the middle. Since the path leading to the portal lies through the grate on the left, the order of the patterns on the pedestals will be the same as in the screenshot.
- Second puzzle waiting for you in a room with raised wooden bridge. With this task it is even easier, next to each rotating pedestal there will be a corresponding drawing, you only need to turn the pedestals in right order, and then pull the lever on the top level of this room and the bridge will lower. From left to right: Fish, Snake, Bird.
- Third puzzle is a door with three revolving stone rings. In front of her you will meet Draug - the lord, from whom you need to remove the Diamond Claw. Then look at the pattern on the palm of the received diamond claw and turn the spinning circles according to the prompt. Top down: Wolf, Butterfly, The Dragon. Next, press the button in the middle of the door and it will open.


Entering the room with the word of power " Storm, Thunder Call”, move along the corridor on the left and leave the Temple. Then turn left and go up to the portal to Sovngarde. Upon reaching it, you will witness how the Dragon Priest Nakrin takes the Staff needed to activate the portal. Defeat the priest and take the staff. Then insert it where Nakrin took it from and jump into the portal. After you get to Sovngarde, the quest "House of the World Eater" will end.
Skyrim passage of the task “Sovngarde”
Quest starts after you get through the portal to Sovngarde. You need to login to Hall of Valor and, together with three heroes of the past, develop plan to destroy Alduin.
Sovngarde is a receptacle of souls, where those who are worthy feast in an eternal feast in the Hall of Valor, waiting for the moment when they will be called by the god Shor to the final battle. This quest is not difficult, you can call it one of the simplest quests in the main storyline. Your only obstacle will be shield-bearer of the god Shor– Tsun required win, so that the Protagonist gains access to the Hall of Valor. Shor can be found at the Whalebone Bridge, just follow the path from where you spawned and you will definitely run into him.
The fog of Sovngarde can be dispelled with the Clear Sky thuum.
Upon entering the Hall of Valor, speak with Ysgramor and then with Hakon the One-Eyed, Felldir the Old and Gormlith the Golden Hilt. After the protagonist listens to their plan, this quest will end.

Dragonslayer - Alduin's final showdown
Exercise starts after the protagonist discusses with the three heroes of the past battle plan against Alduin.
You need leave the Hall of Valor and move to the place where your associates are waiting for you - Ysgramor, Hakon and Felldir. Uniting with them your cry " Clear sky”, dispel the fog sent by Alduin, this must be done three times, since the evil dragon sends it again and again. After he gets tired of doing this, Alduin will fly in himself and here the usual fight with the dragon awaits you. Yuzayte " dragon slayer” and beat Alduin with everything that comes to hand.
After defeating the main antagonist of the main storyline, you can learn a new thu'um from Tsun " Call of Valor». Leave Sovngarde You can again, after talking with Tsun.
On this cheerful note and ends the main storyline of the game The Elder Scrolls V: Skyrim.